At long last, progress is back underway on the OSO project! A resurgence of interest in Blender in the last eight months has led me on a meandering but creative trail through bingo hall equipment, railway cab equipment, various buildings of my own design (such as 60s hospitals) to experiment with architectural features that the OSO complex does not feature, as well as general equipment, furniture and a lot of mechanical equipment such as the excellent Blend Swap centrifugal chillers, that are very similar to those at OS.
I have also have a new plugin from Blender Market that generates pipes from curves/lines as this is one of the weaker aspects of my OSO model in places such as the Subway. As the current ones use lines (curves) then it will just be a case of applying the new material and it should change the pipes to the correct width and assign one of several stock materials such as shiny metal, rust etc or a separate plastic pipe for drains etc.
I then needed pumps and calorifiers and spent over a week on constructing separate pumps for chilled water and the cooling tower pumps ready to install in my OSO model. I updated the calorifiers I made for the OSO model complete with full pipes and pumps. I made an air handling unit with heat exchanger and humidifier that may work for my OS model and some centrifugal fans but I was less successful with axial/propeller fans.
Next was a new fictional hospital building containing labs and a canteen/restaurant and this led me to making a lot of 60s catering equipment, with extensive research into the size and number of items along with old photos of the newly completed OS Restaurant kitchens – general purpose ovens, boiling tops (hobs), boiling pans. Next up would have been a fitted cold room and kitchen extractor units, and dishwashing machines. These were just as much at home in my fictional 60s canteen as they are at Maybush.
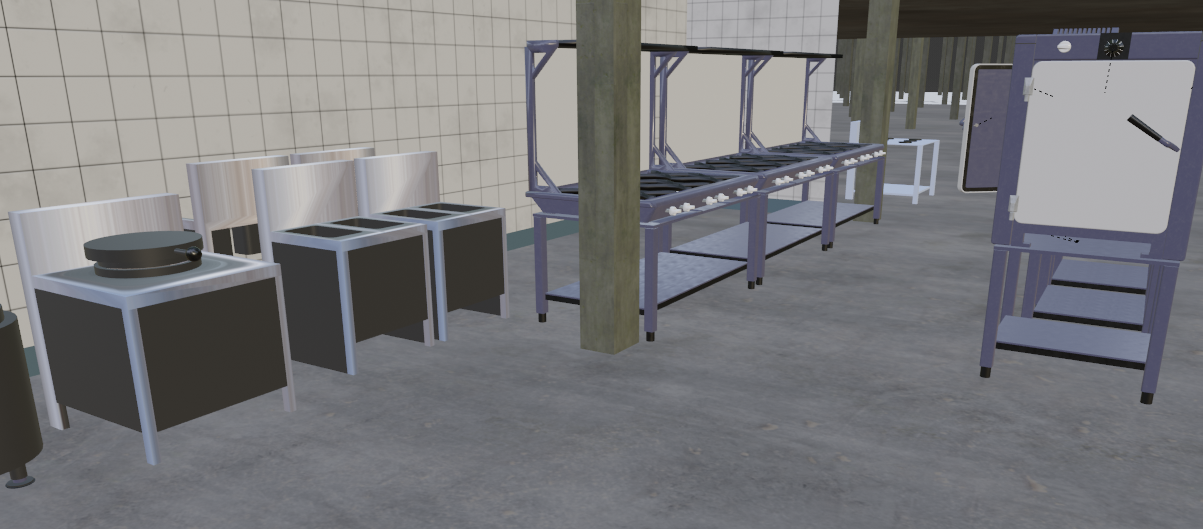
Catering equipment seen in a different model
The new building had a suspended ceiling with vent grilles that again, I hoped would be of use for OS Cooling towers, waters treatment systems and rooftop water tanks are also major items of plant that will be needed for the main OSO along with lifts.
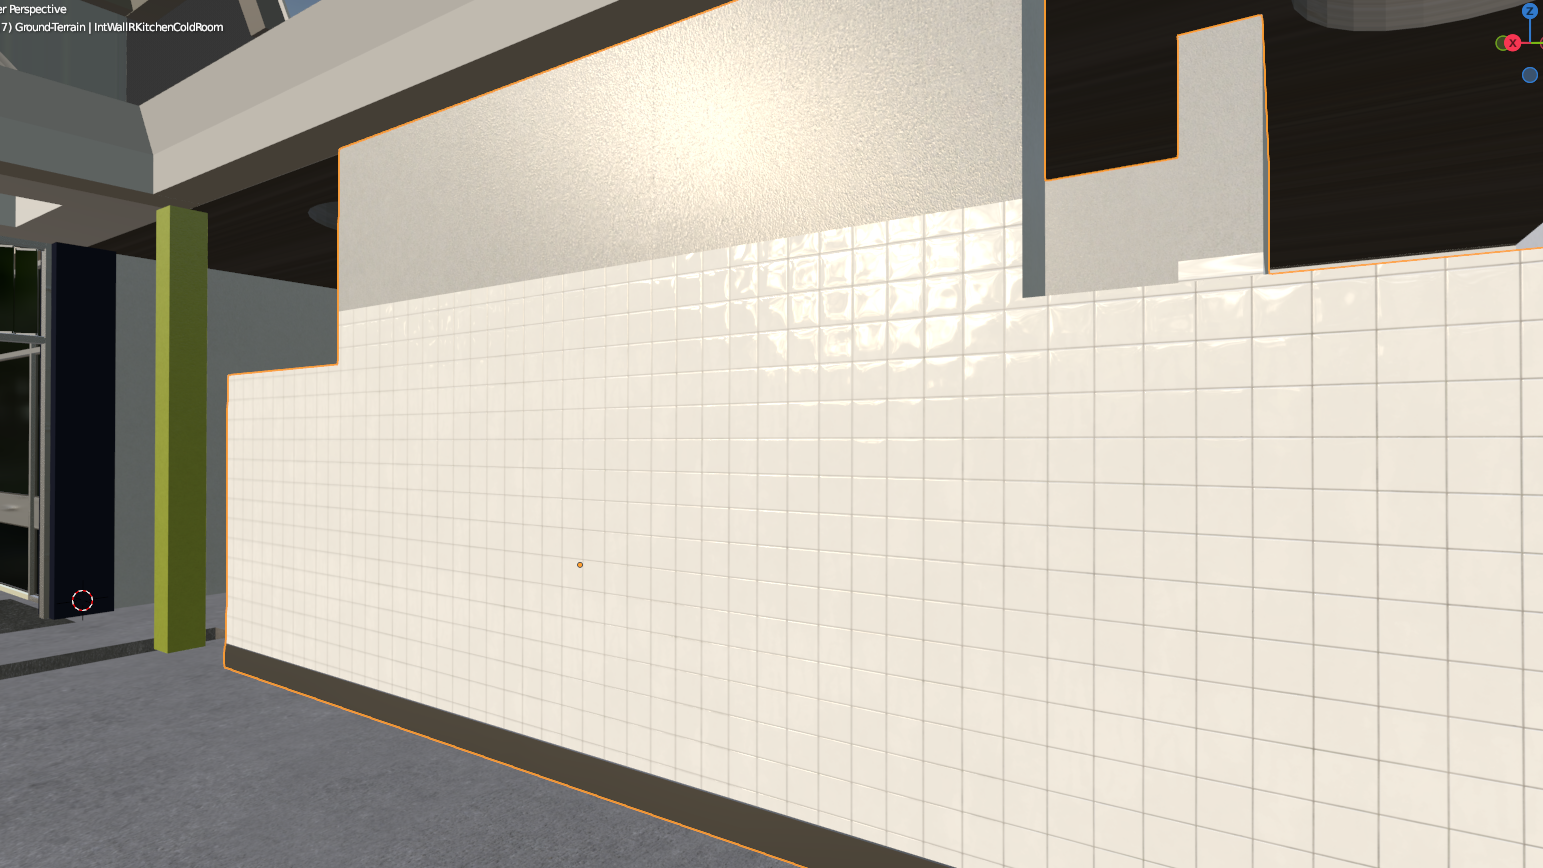
My other work this year has used a lot of PBR materials. The Materialiq materials have some of the components of PBR materials but for things like the restaurant’s white wall tiles where , PBR brings the previous flat PNGs to a new level with the impression of height and selective shiny surfaces. I was also very pleased to find a PBR material for the yellow wood effect block flooring (Granwood) that was used for the main Print and Helio flooring.
A new film scanner has led to a complete new set of high resolution drawings for the OS site and this naturally lead to a progression back into working on that as my main project.
There were several potential entry points to get myself back in the swing of it (after a month or so of scanning and processing the resultant images). Timber doors and glazed screens, West Block brickwork, remodelling pipe systems. I thought either of those would be a relatively straightforward ‘quick win’ to start with.
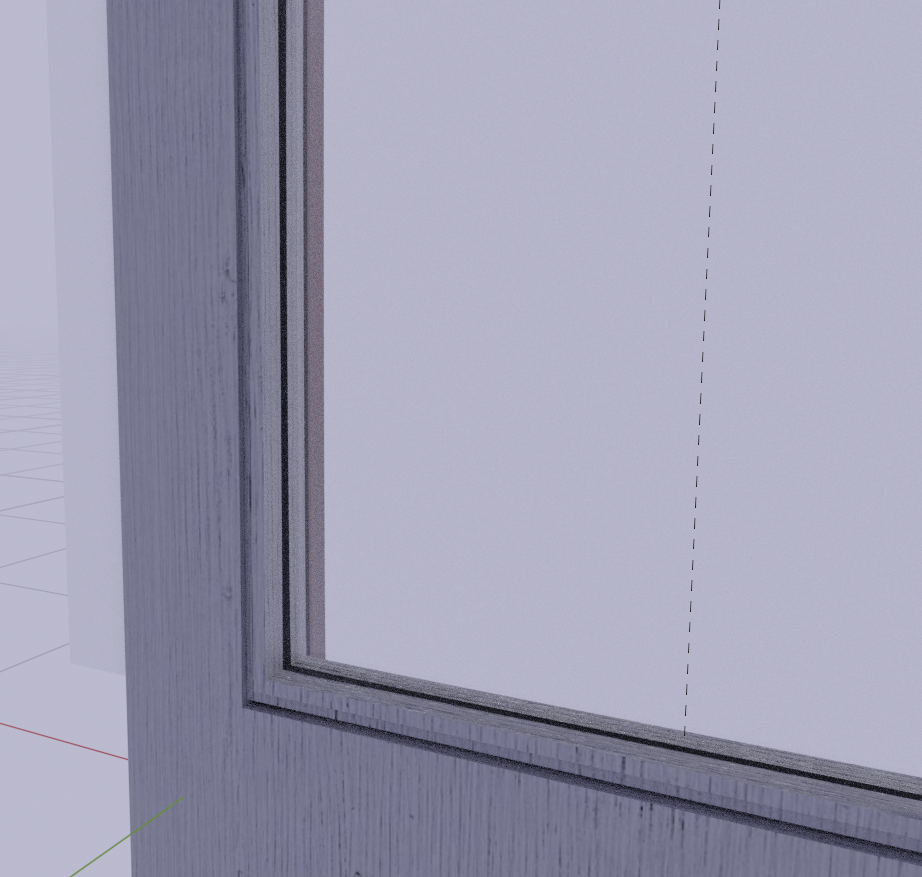
The timber doors and screens across the entire site have a small inset to the glazing bead, only a centimetre or so but quite a distinctive detail to the otherwise-utilitarian timber. Every other part has a dimension line but there are none for that that I have found so I will keep looking. I may have to do what I did with the Restaurant and create a temporary set of doors/windows with a guesstimate of the dimensions. The other snag with that is that the internal timber glazing is wired glass (a fire safety precaution I think ) and very common in buildings of that era. I suspect I can create this somehow using an alpha layer to mark the glass transparent and the metal opaque but I will ask for assistance on the Trainz content creation forum or Discord as they are experts in Blender and making PBR materials.
I may also need to try create the dark brick used for West Block, Services Block and the back of the Restaurant – this has a non-standard bond – Flemish? However, I have found a brick that is otherwise the right colour and shape, just standard bond.
I am also not 100% happy with the vertical timber boarding; using a PBR texture doesn’t give the right effect. Now I know the thickness of the planks then I can model the actual planks and then ‘bake’ them to a PBR texture perhaps?
I have been more successful with the white glazed tiles, which look very realistic with a PBR material from a free site with a large collection of PBR materials really bringing out the shiny effect
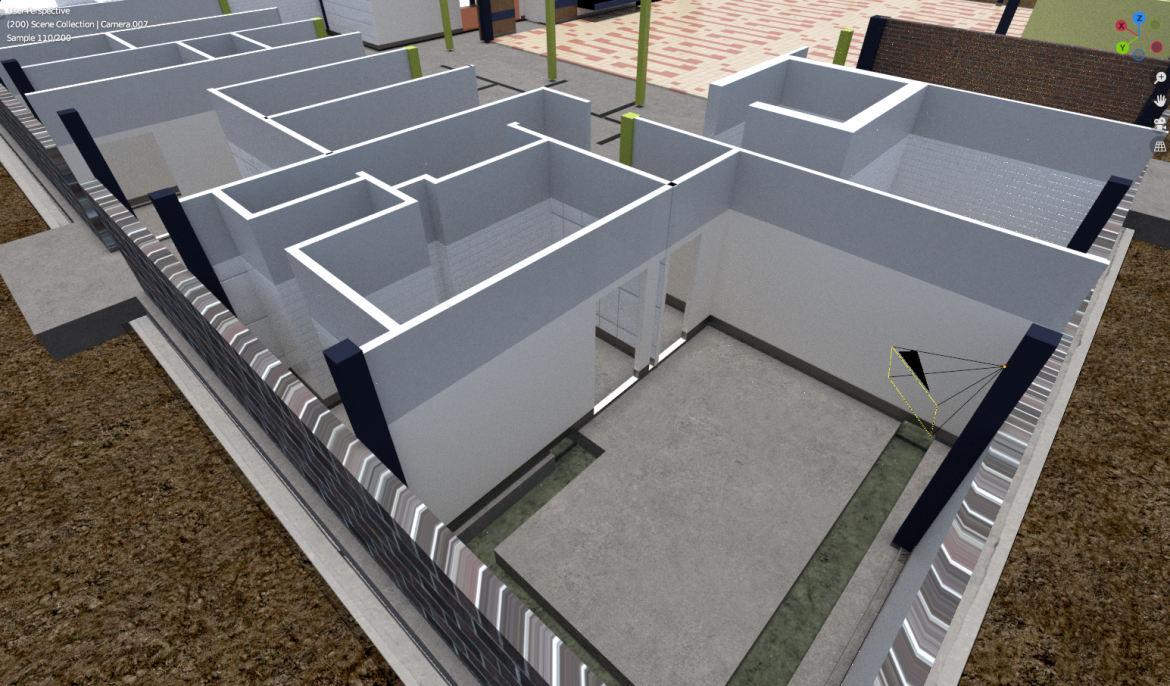
I started work on finishing the foundation slab, which has a complex system of sub-floor trenches for pipes/cables, like the Helio floor I made a few years ago. Some are deeper than others and there are also holes between the ducts and the plant rooms in the basement – Calorifier Room and Booster Pump Room. There are sloping ducts leading to the Calorifier Room, which I cannot find any sections of so have had to guess. They are not visible anyway as they will be covered up eventually with removeable ducts covers. The Central Block ones need doing as well.
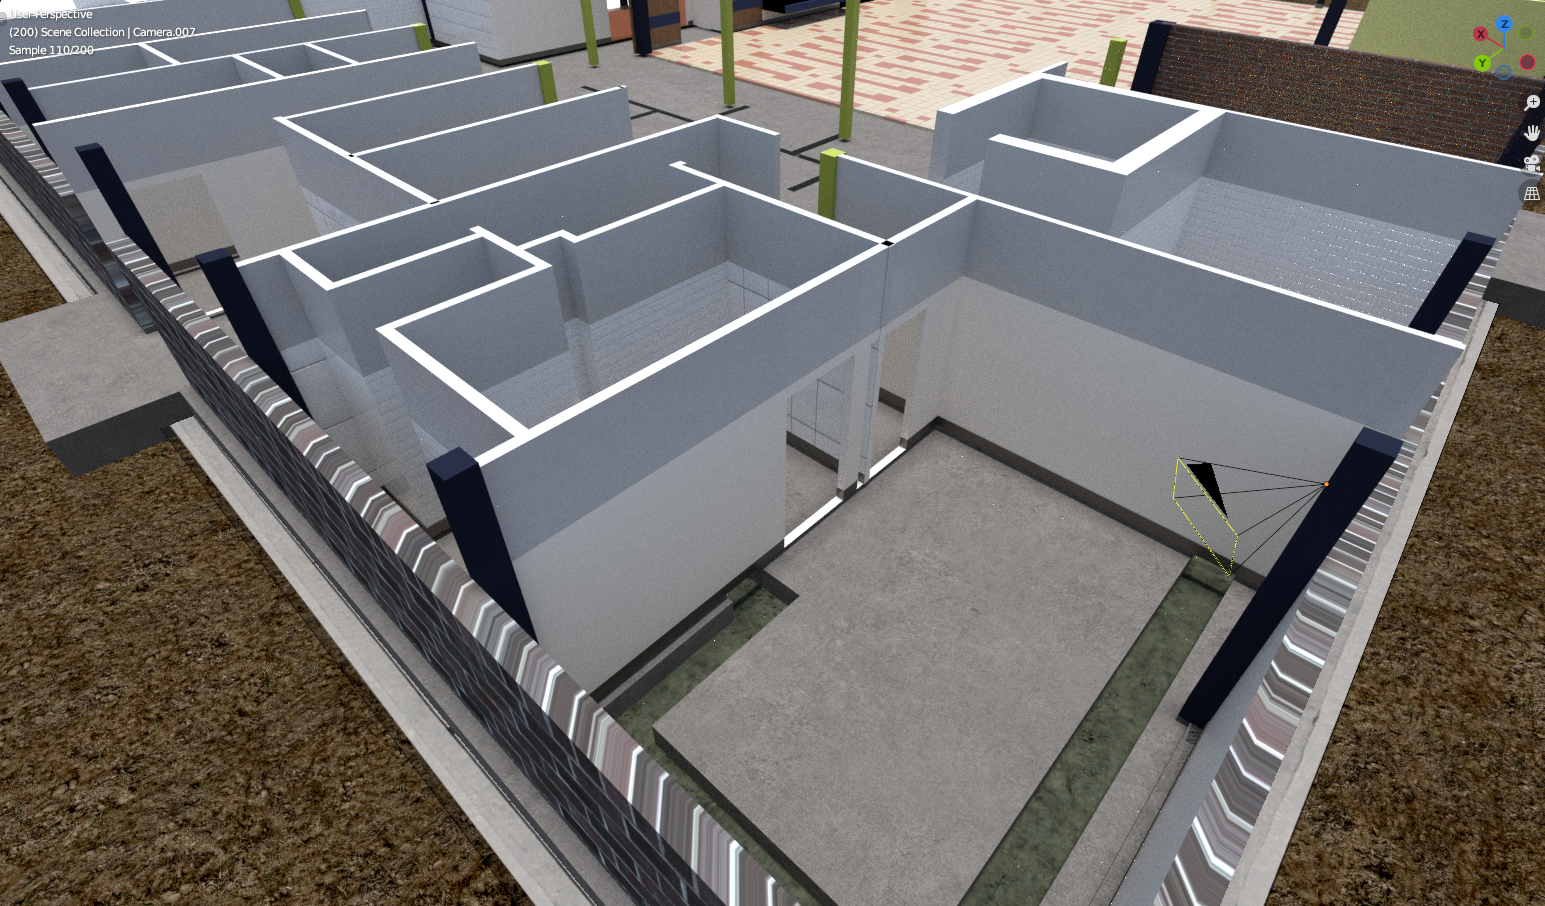
In the process I am also checking the height and wall thickness of the basement rooms, which should hopefully be finished soon while the floor slab ducts will take longer. I can’t find any plans of the heating pipes for the Restaurant but there were radiators at the perimeter of the main lounge at the front, with ducts leading to them. The radiators will be a pain to model.
Another pain with the foundation slab is the edges, which protrude and give the impression of the restaurant floating on top of the foundations, with an unusual edge profile. These are quite prominent so will need to be constructed carefully and then cloned and separate edge beams made for each side.
I found another unforeseen problem on seeing the stairs, which I thought I had imported from the separate model I had made relatively recently but the ones in the Restaurant are definitely original from when I imported it into Blender from Max. They will need replacing and the heights sorting, along with the railings. That should be fairly straightforward to import the correct models.
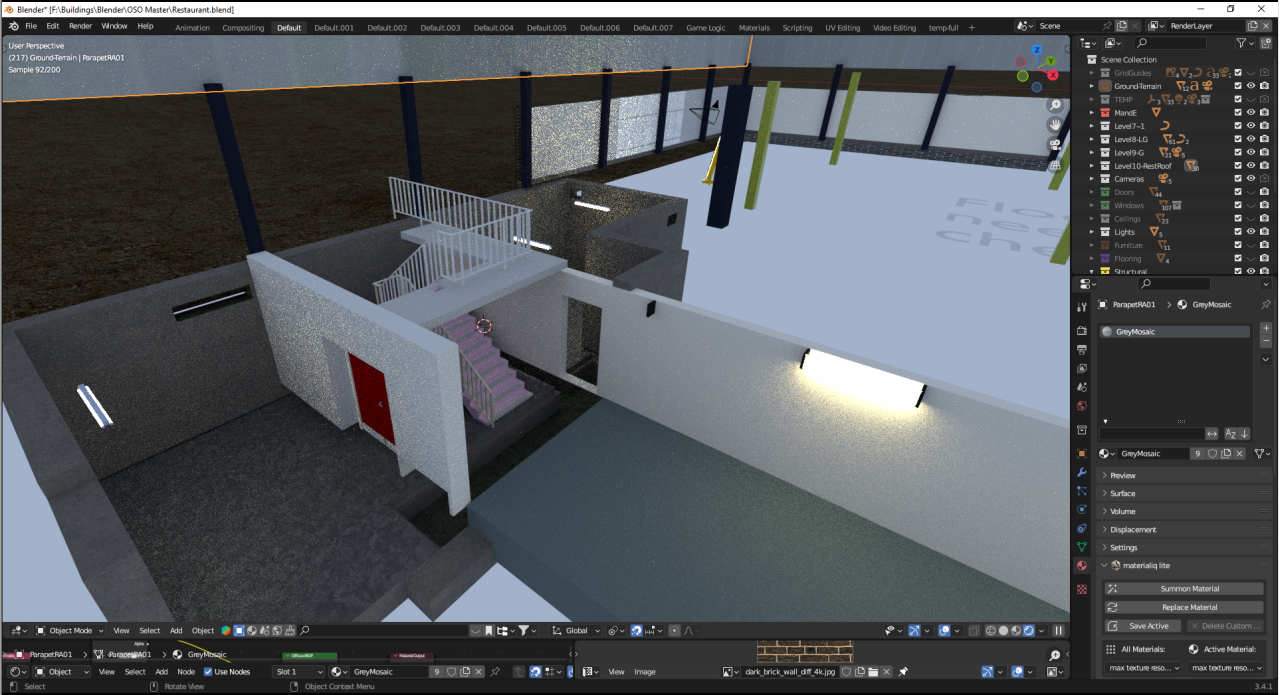
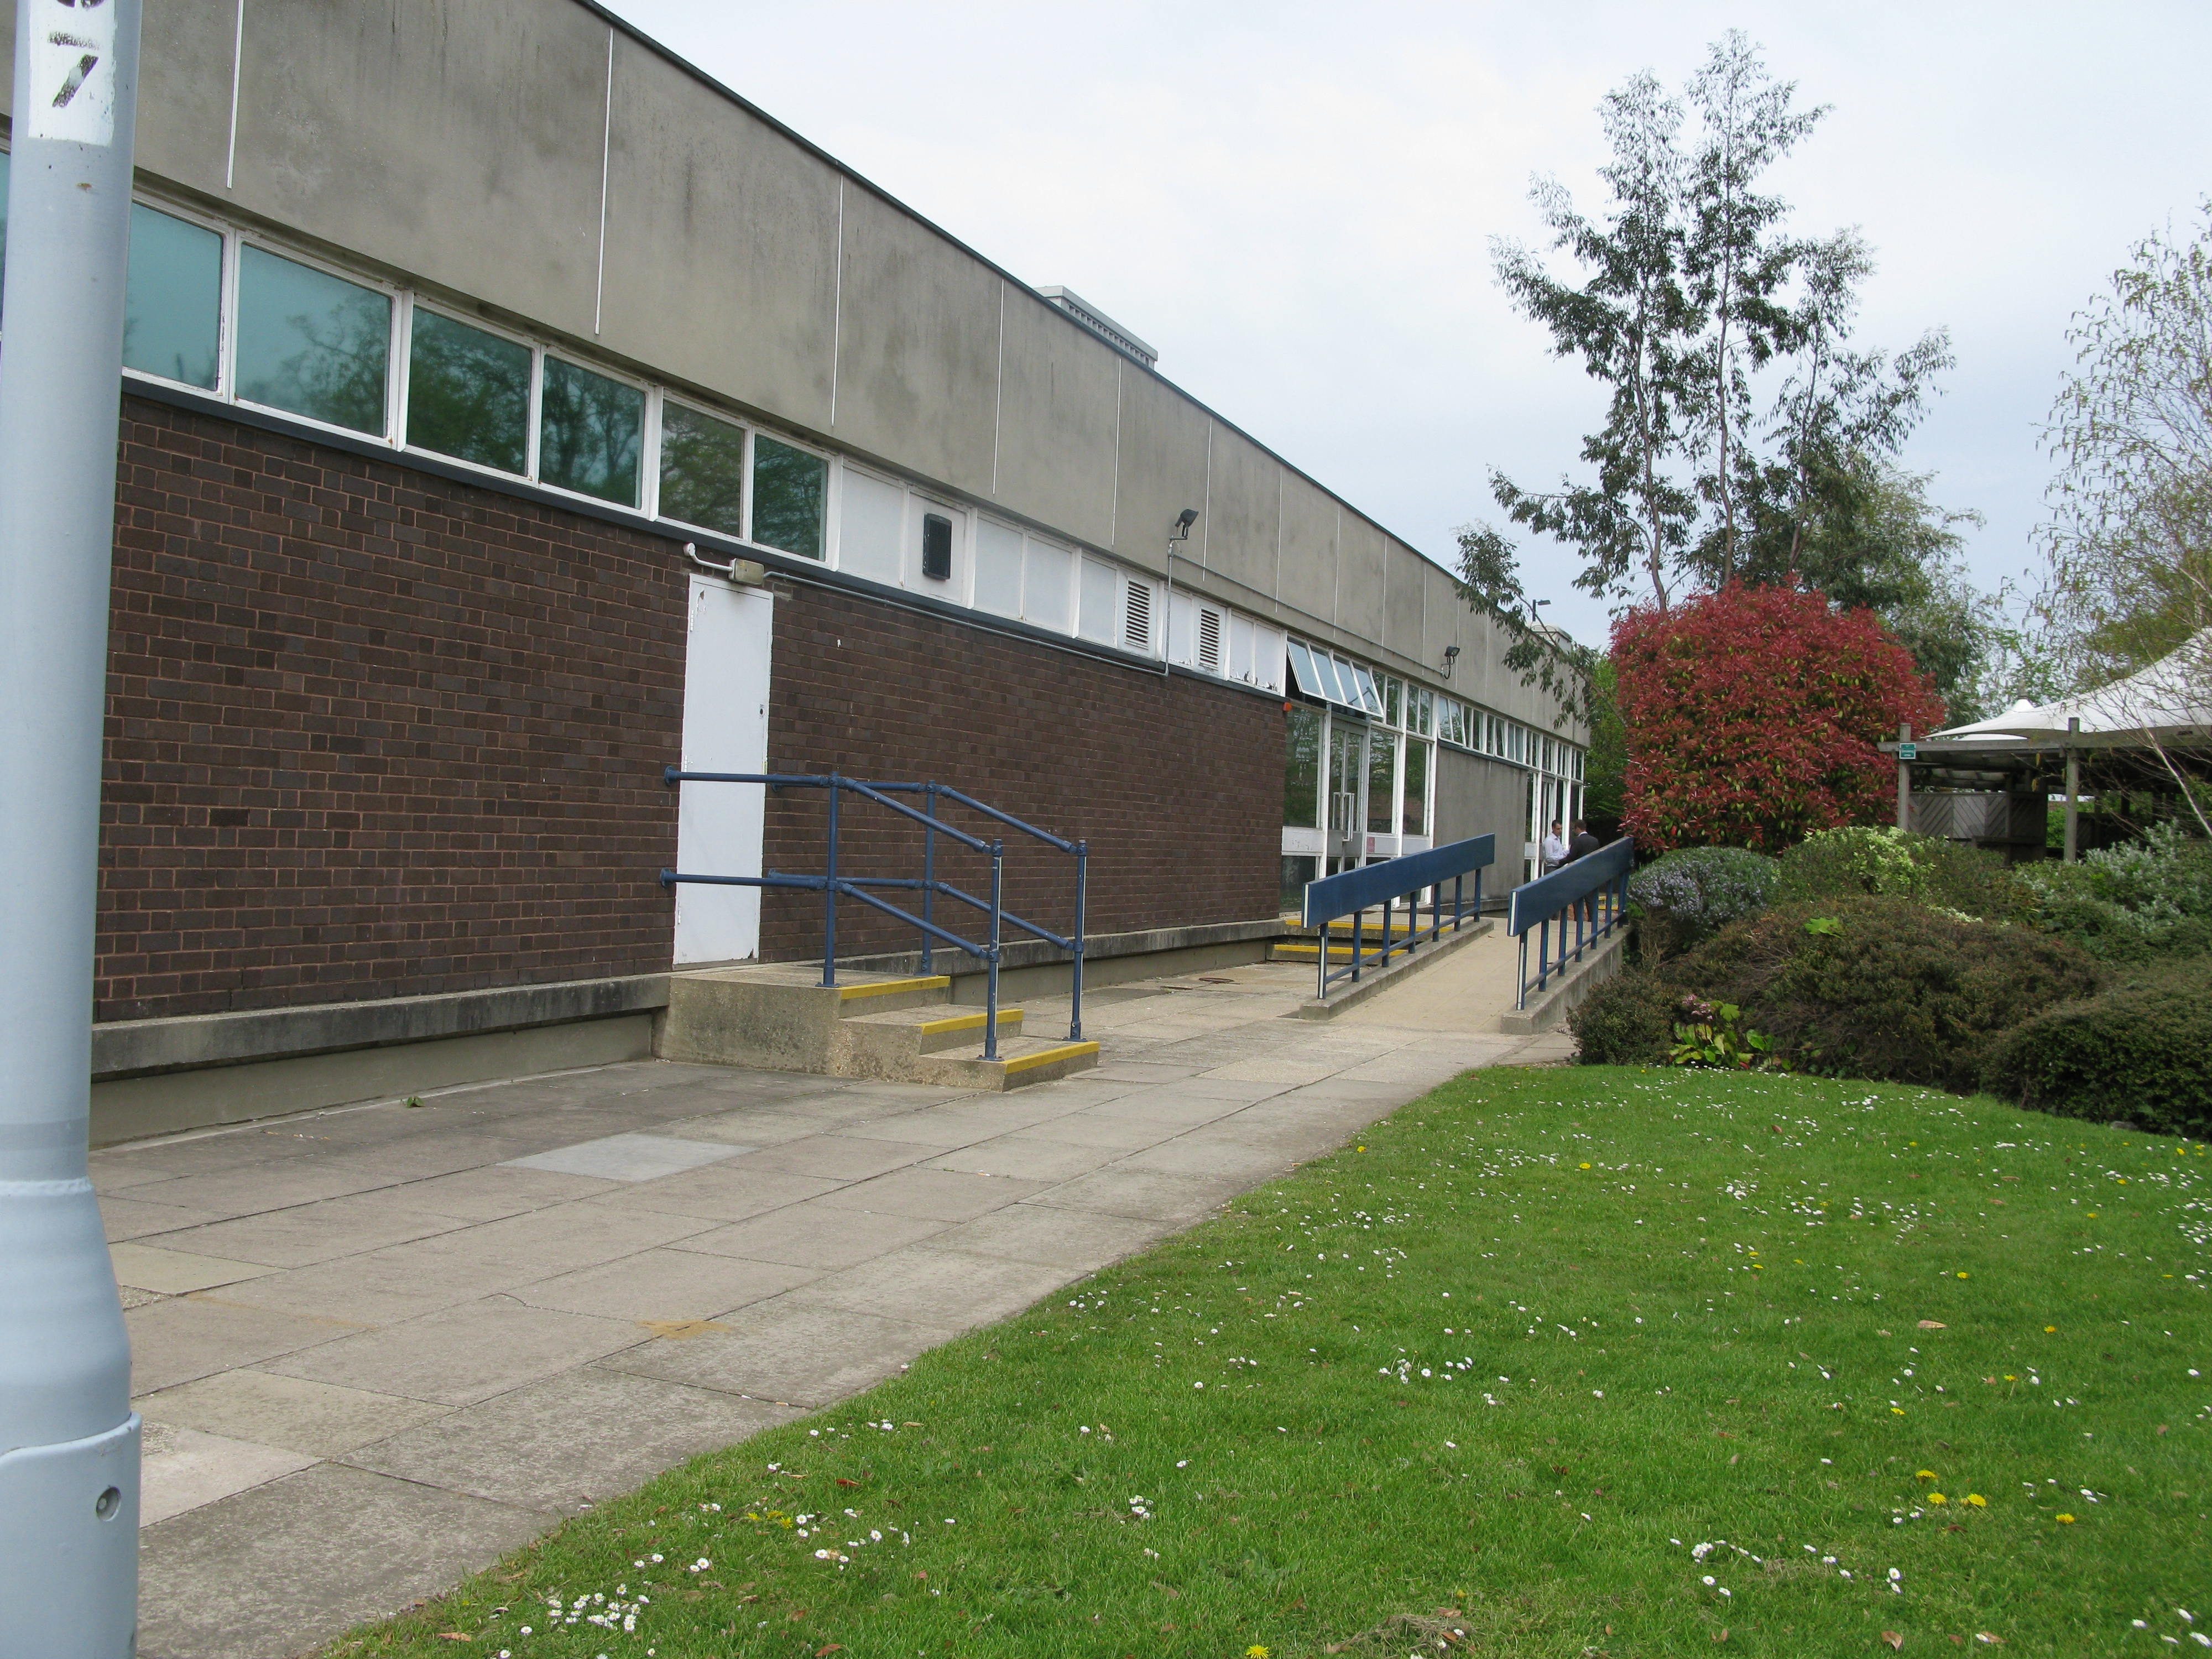
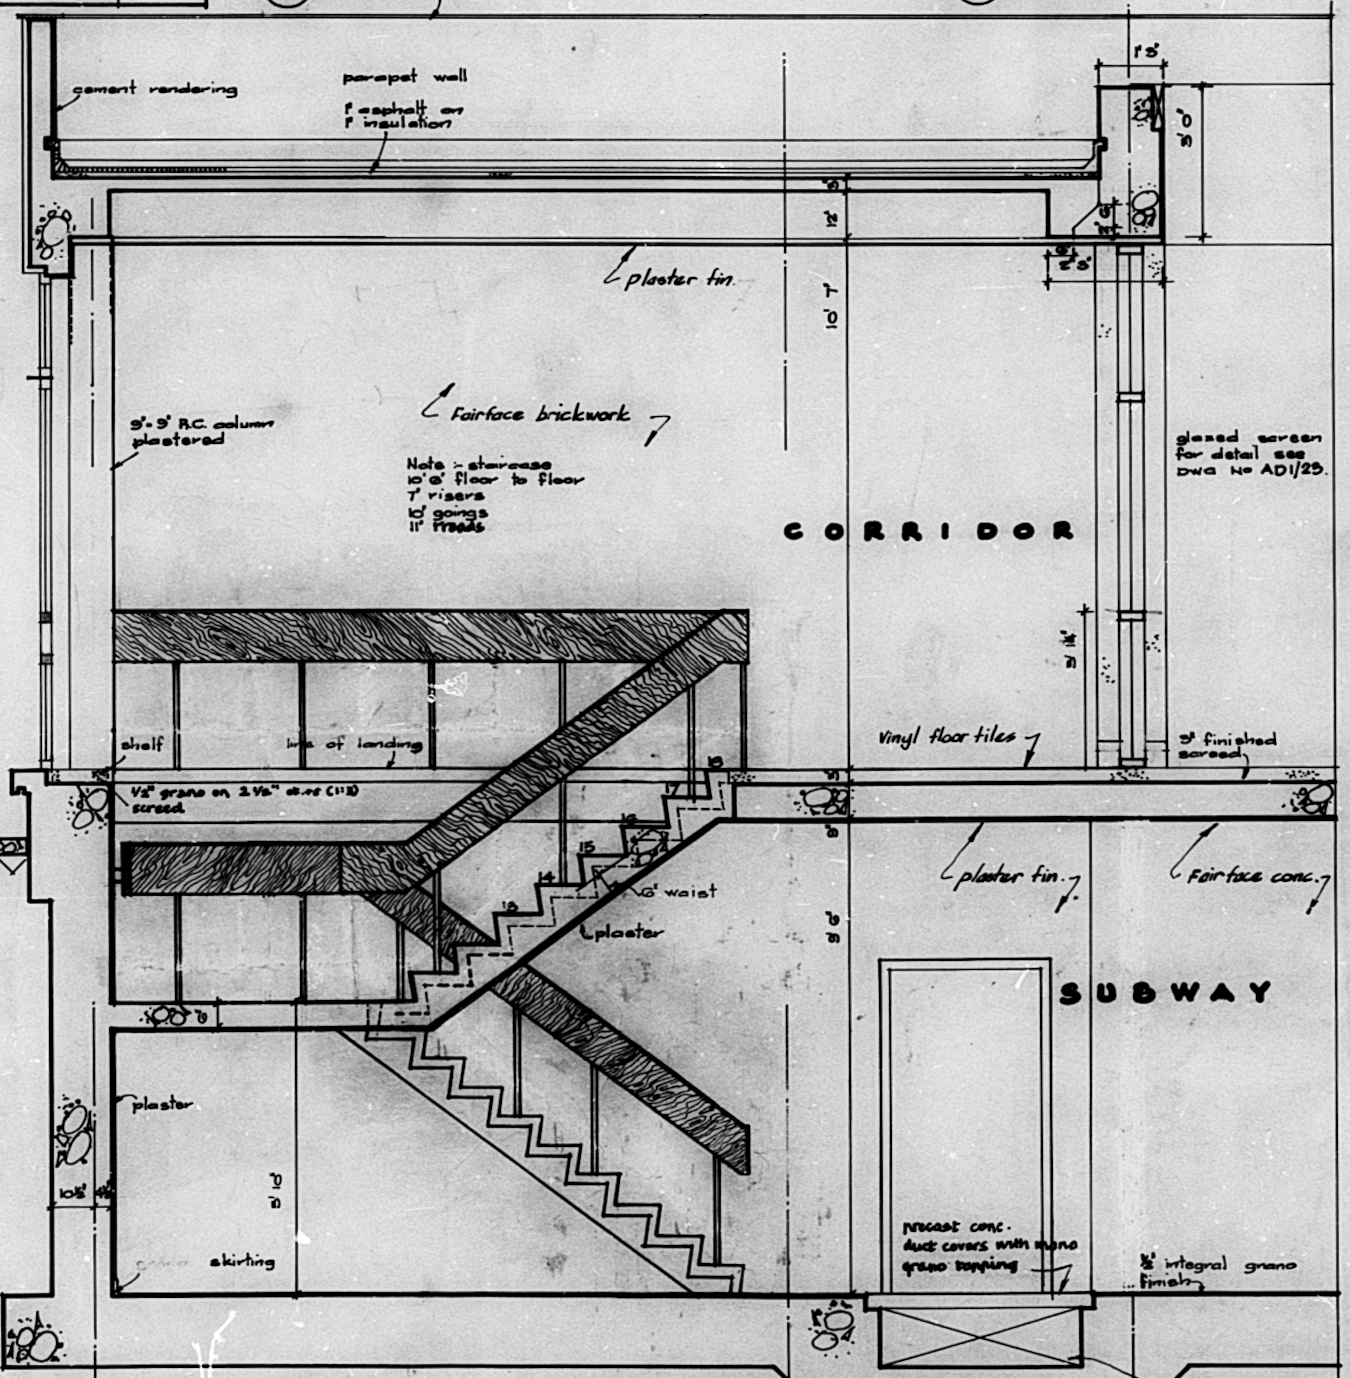
Talking of railings, the original drawings show a very different form of railings (below). I am not sure why the design was changed. This drawing was amended on 21 Nov 1966 so you would have thought it would have been updated. I prefer the original design, it is much more 60s than the narrow vertical bars and narrow top rail that was actually built.
After the foundation/stairs work has been completed then my attention will be moving onto the flat roof slabs, more structural work! These have concrete ribs to strengthen the slabs and a lot of holes, from circular roof lights to ventilation holes and ‘toilet incinerators’. I didn’t realise there was a small ventilation system on top of the front coffee lounge but none of those holes exist and I will probably try and build the ribbed profile rather than having a flat slab, using an array to produce the ribs based on the design of one.
I have also been tinkering with the external walls behind the kitchens as they are rather different on closer inspection, with a slate cill externally and tiled or plaster cills internally but that needs more work.